RiftRay - Hacking shadertoys for fun and no profit
So you see a ton of gorgeous shaders on Shadertoy. You’re thinking: “This is blowing my mind on a screen and all, but I want to go there.” Well, put on some Perturbator and fire up your favorite text editor; I’m going to show you how.
Click the title at the top of the frame above and you’ll be taken to that shadertoy’s page on the Shadertoy website. You’ll see all the source code in a text field on the right side - we’re going to be editing it in place on the site, then copying it to a text file for RiftRay.
We’ll need to make a couple of manual changes to it to work in RiftRay. Note that these changes are somewhat out-of-date since support for VR shaders has been added to Shadertoy; it looks like the >100 shadertoys included with RiftRay will need adjustment. Nevertheless, it works for now, and I’ll be sure to update this post once the changes have been made. From that point on, any shader made with the VR mode entry point will work in RiftRay. Then again, it will work in Shadertoy’s VR mode too.
Editing shader source
The first thing we have to do is add correct accreditation for the author:
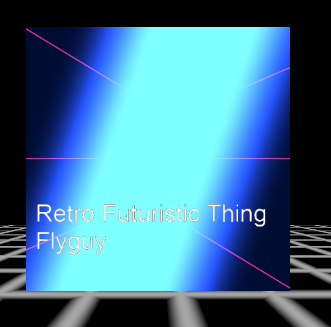
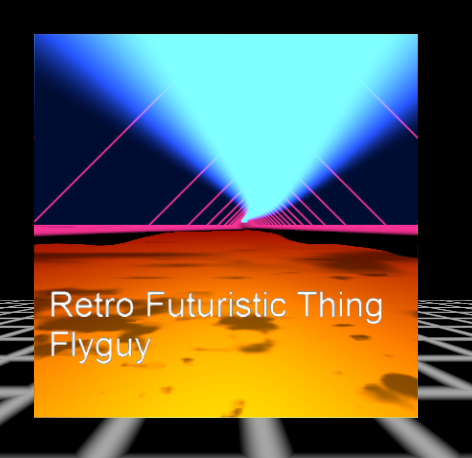
// @var title Retro Futuristic Thing
// @var author Flyguy
// @var url https://www.shadertoy.com/view/4dt3RX
// @var license CC BY-NC-SA 3.0
These lines are comments, so they don’t affect the shadertoy’s execution, but while RiftRay is loading the shader it looks for the string and parses out variable decls and values for use in the tweakbar. These lines will make sure that Flyguy gets his due props for creating something awesome and giving it to all of us on a permissive license.
NOTE: The default license is CC BY-NC-SA 3.0 - be sure to check for and honor any licensing info in comments in the code.
Texture channels
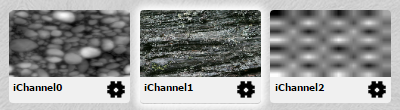
The next thing to do is plug in the correct textures for each channel. Shadertoy has a set of texture images that RiftRay has indiscriminately copied for its own use. We need to point the correct textures to the correct channels. Retro Futuristic Thing uses 3 texture channels.
Using Chrome, you can press F12 to get a developer console.
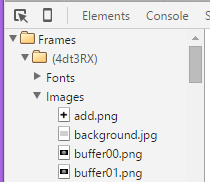
Under the frames heading, you should see an Images list.
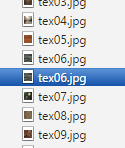
When you see a filename listed twice, it’s a good sign that the second one is going to be the big version. Match it visually to the channel number that’s using it(e.g. iChannel0) Add a few more crafted comment lines into the source to point RiftRay at the right texture images for each channel.
// @var tex0 tex19.png
// @var tex1 tex06.jpg
// @var tex2 tex15.png
Patching in the entry point
Now we get to the tricky part: we have to patch in RiftRay’s entry point function vec3 getSceneColor( in vec3 ro, in vec3 rd ) to the shader source. The first thing to do is put a #ifndef RIFTRAY just before the function void mainImage( out vec4 fragColor, in vec2 fragCoord ) and a #endif right after its closing brace.
#ifndef RIFTRAY
void mainImage( out vec4 fragColor, in vec2 fragCoord )
{
	...
}
#endif
This macro is not defined in Shadertoy, so I recommend doing all your edits on the site itself so you can incrementally test if you broke the code during editing. Now paste this in above main:
vec3 getSceneColor( in vec3 orig, in vec3 dir )
{
}
Finding just the right lines of source to move into that function can be difficult - but lucky for us, Flyguy has made it easy. The orig and dir variables are very clearly named, and they are exactly what we want to pass in to our function. They represent a point in space(the center of the iris) and a direction pointing out from that point. As a user moves their head around, RiftRay will take care of passing in those 2 variables for each pixel, and a color will come out of the shadertoy.
We want lines 298-310. Select them, cut, and paste them into the getSceneColor function. Add the line return color; to the end of the function. To verify correctness, you can patch in vec3 color = getSceneColor(orig, dir); in its place in main, and rebuild the shader. It should all still look beautiful.
Testing it out
Now it’s ready to drop into RiftRay. Select all the source, copy, paste into a new buffer in your text editor and Save As retro_futuristic_thing.glsl in RiftRay’s shaders/ directory. Launch RiftRay and it should load up. Leave your headset off for now - there’s a non-zero chance this thing could still cause nausea.
Well… that doesn’t look right. Hop on in there anyway and see what’s wrong. Move the camera around a bit and we can see that it looks like we’re pointing straight down. The y axis is up, and negative z should be forward, so let’s swap y and z. At the top of getSceneColor add:
    orig = orig.xzy;
    dir = dir.xzy;
Better, but everything’s upside-down. Add two more lines before the swizzle:
    orig.y *= -1.;
    dir.y *= -1.;
    orig = orig.xzy;
    dir = dir.xzy;
But why before? Don’t we want to invert what is now the new y-axis? In pure fragment shader land, everything is backwards: transformation orders, numerical values. You could think of this as transforming the world around you in the inverse instead of transforming the object in obverse. I just code it up the way that makes sense to me then reverse it, step by step.
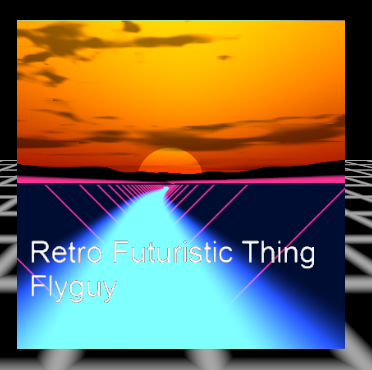
Looks right, but the sun’s behind us.
    orig.z *= -1.;
    dir.z *= -1.;
Got it! Fly the camera to a spot that looks good and read its position from the tweakbar, copying it to another comment line:
// @var eyePos -0.24 0.72 0.62
Full Customization
Now that it’s all working, we could just bask in its beauty for a while with some Gunship. But if you feel a megalomaniacal need to control the world even more, we can add some variables for your tweaking pleasure.
Check out the top of this source code: Flyguy has left us labeled and categorized parameter values in #defines right there. All we have to do is plug these in to RiftRay’s variable finding system and we’ll be able to change the values live.
Let’s take a simple one first: GRID_LINE_SIZE. A single float value, we’ll take out the #define and add a uniform variable declaration in its place. Just above it, we’ll add another special comment line with the following tokens:
- @var
- variable type (float)
- variable name (GRID_LINE_SIZE)
- initial value (1.25)
- minimum value
- maximum value
- increment
//#define GRID_LINE_SIZE 1.25
// @var float GRID_LINE_SIZE 1.25 .25 15. .25
uniform float GRID_LINE_SIZE;
We can guess and play with these bounds and increments until the range seems right. For the color values, AntTweakBar has a special type we can use by adding the string ‘color’:
//#define SKY_COLOR_1 vec3(0.60,0.00,0.00)
// @var vec3 SKY_COLOR_1 0.60, 0.00, 0.00 color
Final Thoughts
Most of this could and should be automated. Shaders that have implemented the VR entry point as per the Shadertoy spec could get everything needed from Shadertoy’s JSON API. I’ve implemented a good amount of this in the kinderegg project, if anyone wants to port it over and send me a pull request.
RiftRay can offer a couple of features the Shadertoy site itself does not yet: dynamic render target resolution scaling and cinemascope for increased frame rates, undistorted mirroring and the tweakbar controls. But it also lags behind Shadertoy’s functionality in a few key ways1: Texture sampling options per-channel, webcam, video, audio, and cubemap texture inputs, GPU sound, and now Multipass Rendering. And that last one is huge.
-
Oh, and a vibrant social network, thousands of shaders, users, comments, hearts, API, search… ↩